Main PDF FAQ page
Freeware postscript/PDF tutorial
Obtaining and installing the Adobe postscript distiller driver
Installing GSView and Ghostscript
Using GSView/Ghostscript to convert from postscript to PDF
Freeware postscript/PDF tutorial
Obtaining and installing the Adobe postscript distiller driver
Installing GSView and Ghostscript
Using GSView/Ghostscript to convert from postscript to PDF
Using the postscript driver to create a postscript file:
Setting the custom "paper size" inside the application:
If you do not need a custom page size, then proceed to printing to a file below.
If you have not yet defined a custom paper size for your postscript driver, instructions are here.
A lot of the following will seem redundant. It is intentionally so because the Adobe menus for postscript setting are complicated and things easily get reset unintentionally, causing problems with the output. We do a fair amount of double-checking before printing.
Windows 2000 (XP is similar):
We start by illustrating the process with Word97. Other applications may have their own interface to the printer settings but things will be similar.
Select the postscript driver as your printer (since it might not have been your default printer).
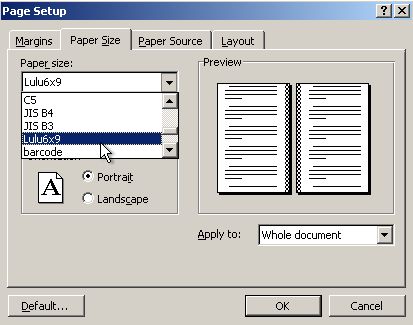
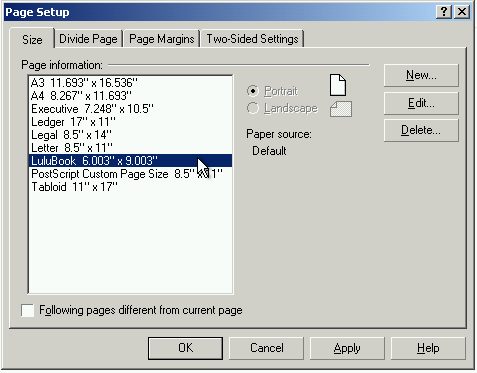
Now we go back to Word and check the Page Setup to make sure we have selected our custom paper size:
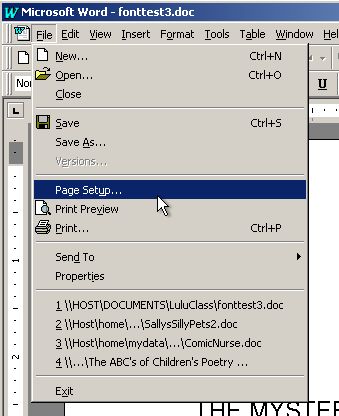
Under the "File" menu, choose Page Setup.
Choose the custom paper size previously defined as a custom form.
Click OK to get back to your word processing project. We are ready to print. Skip down the page to printing the file.
One more time:
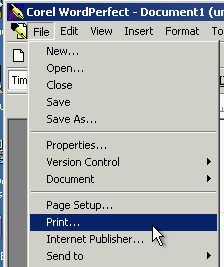
This example uses WordPerfect.
First, select the postscript driver as your printer:
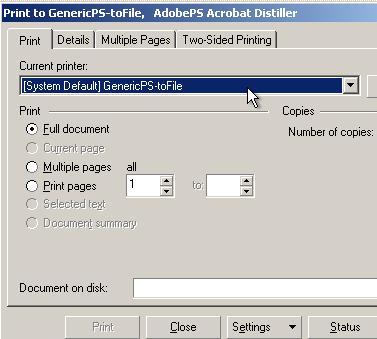
Select the postscript driver that you installed:
Now you should be able to choose the custom page size from File=>Page Setup. If the size is not listed, you may have to select "New" and choose it from the drop down menu of sizes.
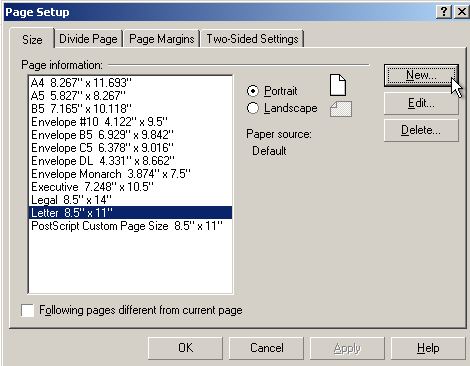
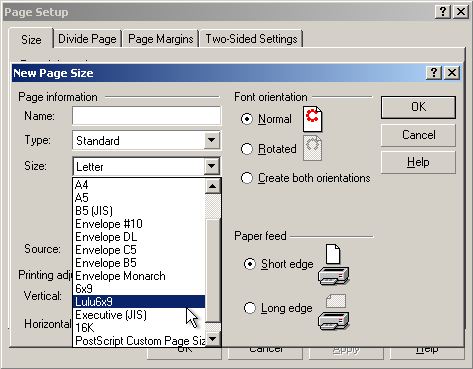
Choose "Size" drop down menu and then select the custom page size from the larger list of sizes (you may also need to enter in a name for this paper size). Finally, click OK.
Now you will be able to choose the custom paper size from the File=>Page Setup menu:
"Printing" to the postscript driver to create a file:
At this point you have created your book in your application and with the desired page size. We will now "print" that document into a postscript file.
Windows 2000:
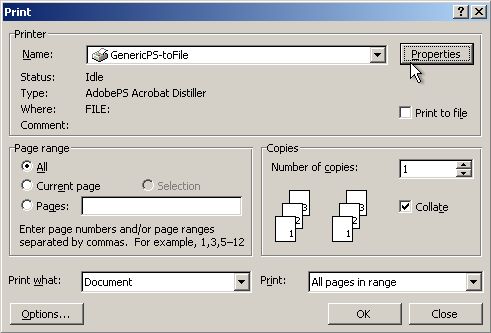
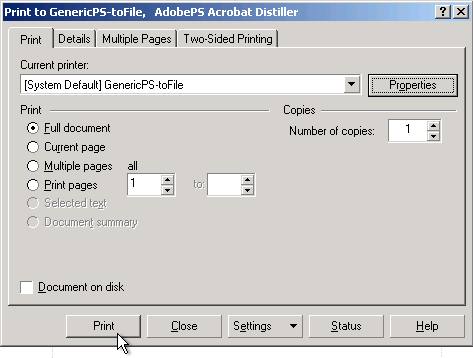
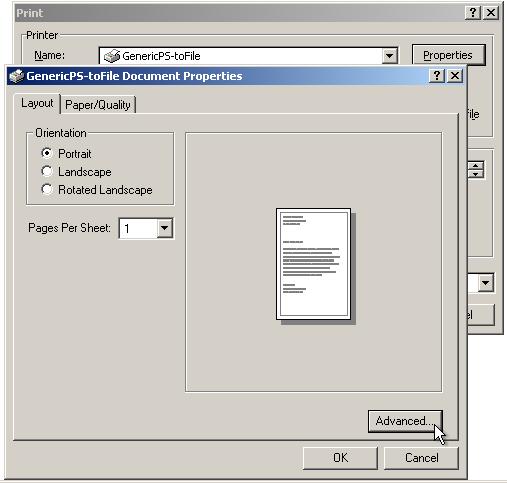
For this example I show Word97 running under Windows 2000. Select File=>Print and then the "properties" button. Click on the "Advanced" button to double-check the driver settings:
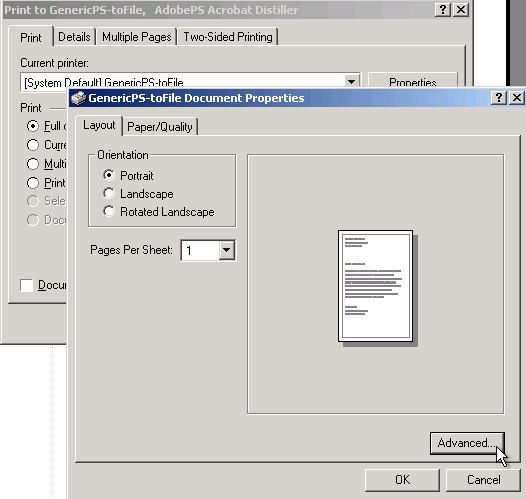
Click on the "+" in the box next to "Postscript Options" and check that "Optimize for Portability" is selected from the Postscript Output Option drop-down menu. Also check to see that TrueType Fonts are set to Download as Softfonts:

Click on "OK" to get back to the print menu where you can click on the "print" button.
At this point you need to enter a file name. Note, that by default Windows would prefer to name that file with a ".prn" extension instead of using ".ps" for postscript. If you change the "Save as type" box to contain "All Files" as show in the illustration below, you will be able to give the file a ".ps" extension. Alternatively, you can simply rename the file changing the ".prn" to ".ps" since the file is still postscript in spite of the extension.
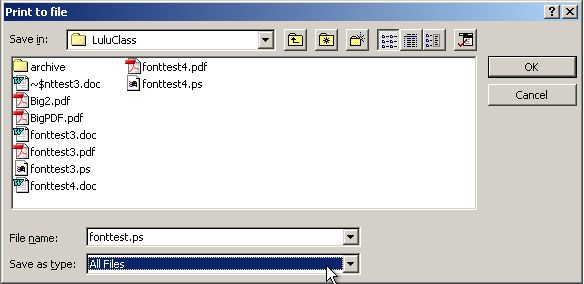
Shortly you will have a postscript file of the name you have chosen.
Windows 98:
This example illustrates printing from WordPerfect 8 in Windows 98. From inside your application and with the document open, select File=>Print in order to get to the print menu. Select the postscript driver as the printer. Select the "properties" button:
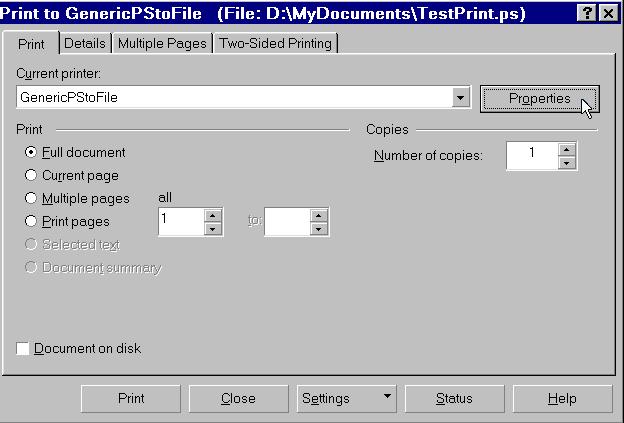
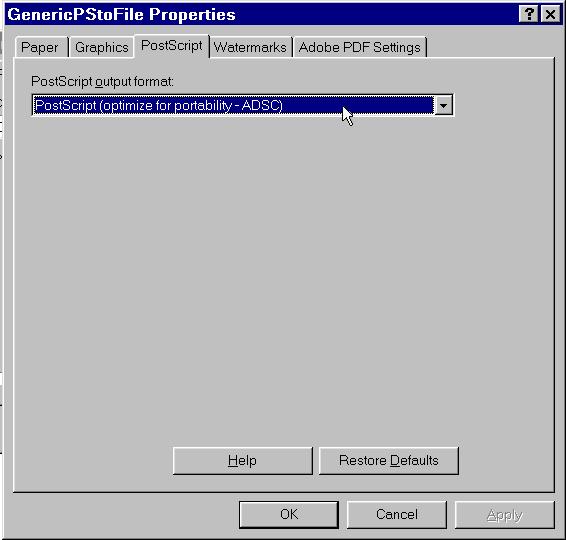
Select the "postscript" tab and make sure that the driver is set to "optimize for portability:"
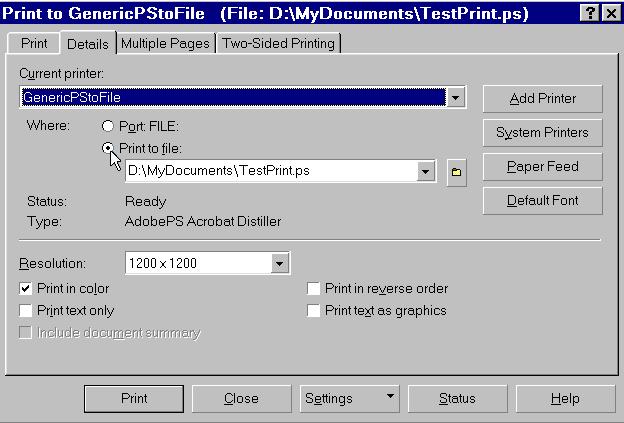
After clicking "OK" and getting back to the main print window, select "Details," select "Print to file" and write your postscript file's name into the space:
Press "Print" and you should soon have the file created.
Now what?
Once you have a postscript file you can upload it to Lulu for conversion to PDF as a part of the "Publish" process. You can then download that "print-ready" PDF and examine it for formatting and the correct use of fonts.
Alternatively, you can look at the postscript file directly on your computer using the GSView/Ghostscript software that you can download from the Internet. This will allow you to look over your postscript file before going through the upload/download steps.
Advanced Topics:
The instructions so far should work for most cases where authors want control over their fonts and formatting. However, if you have TrueType fonts that come with licensing restrictions they will not be sent to the postscript driver and therefore will not print correctly. You can likely solve this problem by setting the driver's font handling to "Send TrueType Fonts" as "Outlines."
The outlines referred to are detailed shape descriptions of the fonts instead of the specific font files. It is essentially asking the driver to draw the fonts instead of sending them to the postscript file for embedding. The result can be indistinguishable from using the fonts directly and it can get around restrictions on some fonts.
The setup looks a little different again, depending on the version of Windows.
Windows 2000:
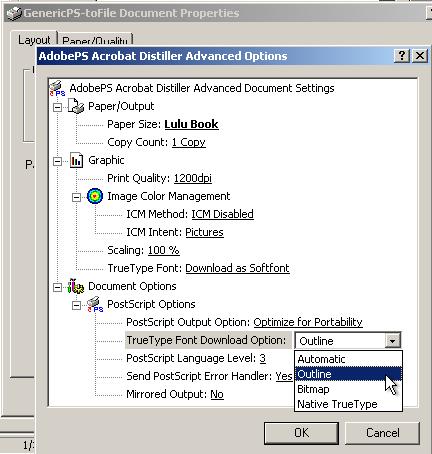
In Windows 2000 we can make the "Send Fonts As" setting from the driver inside the application at the time we are printing. The illustration is from Word97 running under Windows 2000. Select File=>Print. click on "Properties," "Layout" and "Advanced:"
Click on the "+" in the box next to Postscript Options and then choose "Outline" from the drop-down menu next to TrueType Download Option. Click "OK."
Windows 98SE:
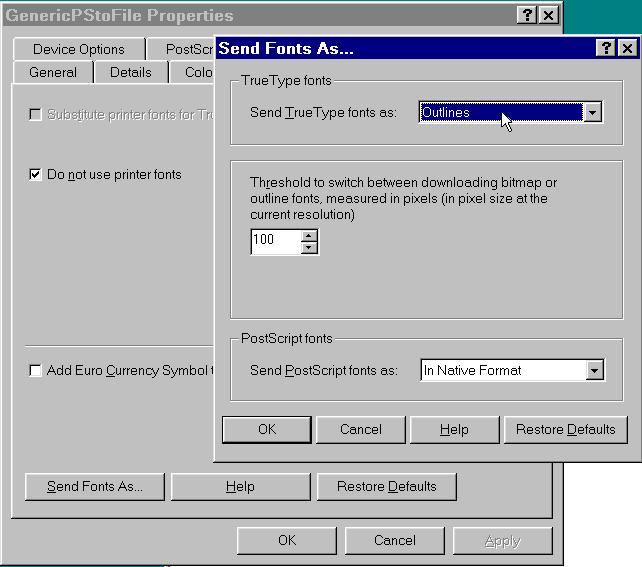
We make the outlines setting from the operating system level. Select Start=>Settings=>Printers and then click with the right-hand mouse button on the driver and select the "Properties" menu. Check the box that says, "Do not use printer fonts" and then click on the button that says, "Send Fonts as:"
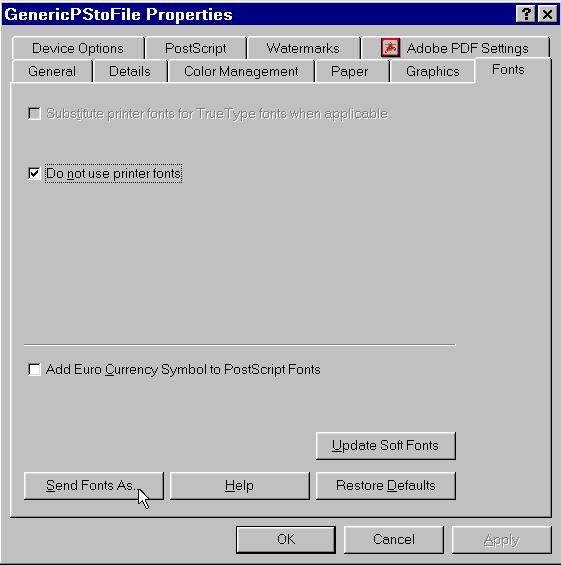
In the "Send TrueType fonts as" window select "Outlines," and click OK.